
From Idea to Reality: HydroFlo’s Custom 3D Printing Process
From Concept to Creation: The HydroFlo Custom 3D Printing Journey
Introduction
At HydroFlo, we believe every great product begins as an idea—and that idea deserves precision, guidance, and expertise. In this article, you’ll follow the complete path: from your initial consultation through design, material selection, fabrication, and final delivery. You’ll gain insight, clarity, and confidence—empowered by proven process steps and best practices used by HydroFlo. Let’s dive into how your vision becomes reality.
Section 1: Initial Consultation & Design Brief
The journey begins with dialogue. In your consultation, we explore the purpose, function, aesthetics, timeline, and budget. At HydroFlo, over 45,000 customers have navigated this collaborative stage—earning trust through clarity and transparency HydroFlo.
-
Questions we tackle: What’s the end use? Who’s the audience? Are there size or fitness requirements?
-
Deliverable: A well‑defined design brief summarizing scope, key specs, turnaround, and next steps.
Section 2: Design & Prototyping
Drawing on traditional CAD discipline, our team—led by certified CAD specialists—translates your sketch or description into a precise 3D model using tools like SolidWorks LinkedIn.
Accuracy is king: we perform geometric validation, part orientation analysis, and tolerance checks to ensure manufacturability.
If needed, we produce prototype iterations:
-
Evaluate fit and scale
-
Identify potential interference or strength issues
-
Gauge aesthetic feel before moving forward
Section 3: Material Selection Strategy
Material choice is a decision balanced between performance, aesthetics, and cost.
HydroFlo supports a wide palette: PLA, ABS, PETG, resin, and engineering-grade polymers. Material choice influences strength, flexibility, surface finish, and cost.
We support certifications, quality inspections, and ISO-aligned workflows for clients requiring rigorous standards Stratasys.
-
Carbon-fiber reinforced nylon: lightweight strength
-
Resins: high detail accuracy, professional finish
-
PETG/ABS: chemical-resistant, functional prototypes
A simple table (in your blog) helps readers compare material pros and cons by property and price.
Section 4: Printing & Post-Processing Workflow
With a finalized design and material plan, we move to production. Our flow mirrors industry best-practices—referencing a structured process: preparation → slicing → print → inspection → finishing ResearchGate+1centercycle.com+1.
-
Slicing software converts your 3D model into layered G‑code.
-
Printer selection depends on resolution and material (FDM, SLA, SLS, PolyJet).
-
Print execution includes monitoring and layer-level control.
-
Post-processing: support removal, sanding, painting, polishing, assembly.
This ensures each target part meets expected specs and looks polished.
Section 5: Quality Assurance & Final Delivery
Quality assurance isn’t optional—it’s embedded. HydroFlo employs First Article Inspection (FAI), Certificate of Conformity, and if required, Production Part Approval Processes (PPAP) aligning with ISO9001/AS9100 standards nature.comHydroFlo+3Stratasys+3cults3d.com+3HydroFlo.
We check:
-
Dimensions vs. design tolerance
-
Structural integrity (stress points, warping)
-
Surface finish quality
Packaging and shipping adhere to stringent protocols—your final part arrives intact, tracked, and backed by a 2‑year warranty and 30‑day satisfaction guarantee ResearchGate.
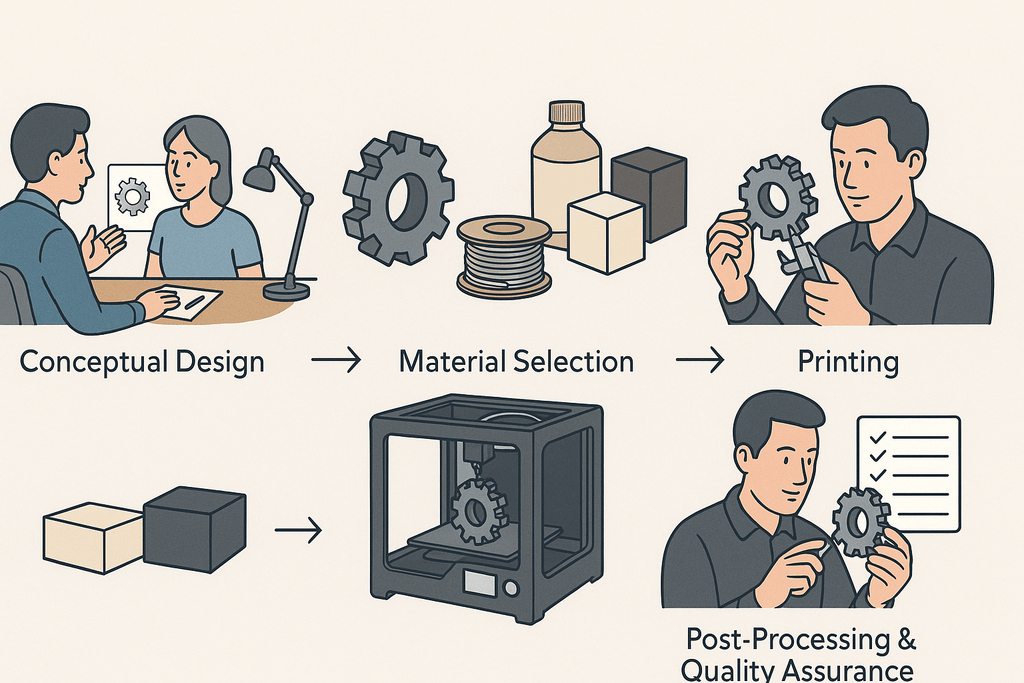
Conclusion
From an initial consultation to hands-on prototyping, material decisions, full printing operations, and stringent QA—HydroFlo leads your concept across the entire journey. Our process draws on traditional values of craftsmanship and precision, while embracing modern standards and scalable workflows. The visuals above illustrate our standardized flow; below, in text, we’ve broken down each step with clarity and detail.
Ready to bring your ideas to life? Discover how easy it is to start your custom 3D printing project with HydroFlo.